As I promised in previous posts, here is something I learned from Scott Kelby out of his 7-step editing process.
This tip helped me work my photos a little faster in Camera RAW. Rather than opening my photo in Photoshop to tone with the dodge and burn tools, I can do it in RAW with a little more precision and control.
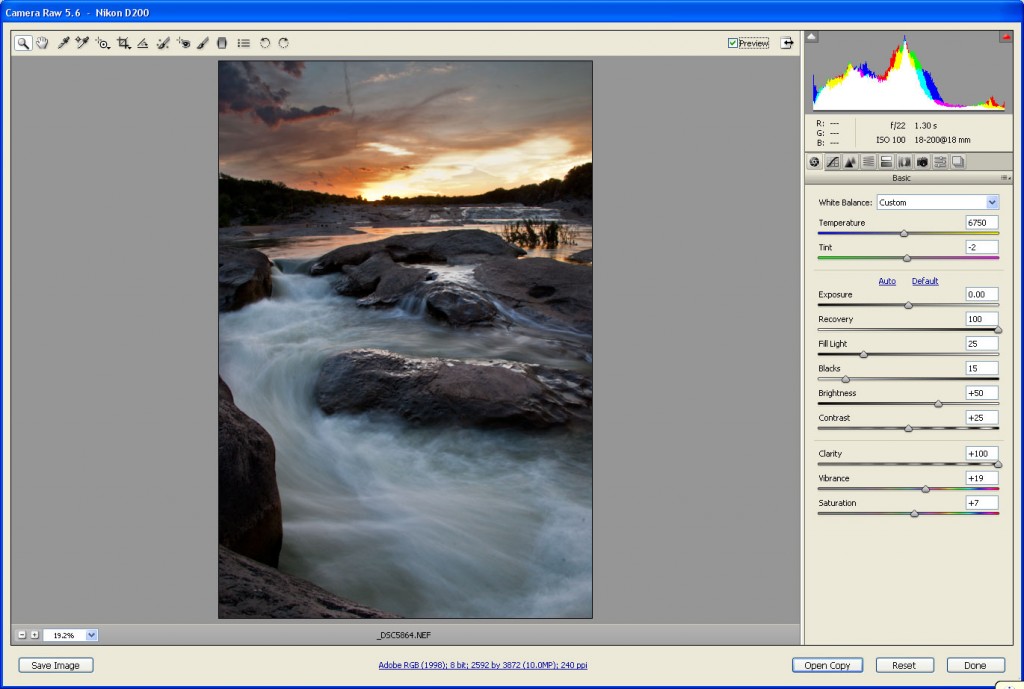
We’ll start with a photo I took a while back at Pedernales Falls State Park. (It’s not the greatest shot, but it will work for these purposes. For some HDR examples from this shoot, go to this blog post.)

Open the photo in Camera RAW like so: (click photo to enlarge)

Adjust the exposure, recovery, fill light, etc. to your liking. I usually move the recovery all the way to 100%, and this photo needed a little bit of fill light and contrast.

Now click on the Adjustment Brush in to tool bar at the top left of the screen. It will take you to a new section of sliders on the right menu. From there, make your brush size (near the bottom right) about 14 or 15 and move the feather slider to a fairly high number. Then move your exposure (top slider) to the left a bit.
Now if you mouse over your photo there should be a dotted line circle with another circle inside of it and a little cross hair inside of that. That’s your brush. Click and drag the brush over the sky to make it darker. When you pick up your brush a little green pin point will show up like so:

The pin point marks where you have adjusted. If you mouse over it, the adjusted part of the photo will be highlighted. After you’ve selected the part you’d like adjusted, you can move the sliders back and forth to find your desired result. (Tip: You can remove parts of the adjusted area by clicking on the Erase mode button.)

When you’re ready to adjust another part of the photo, click the New button at the top of the right adjustment sliders. Click and drag over another adjustment area on the photo and move the sliders to change what you’d like changed. (Tip: If you need more precise editing, try clicking on the Auto Mask mode. It will help with editing shadows and other trouble areas.) I made my water a little lighter and brighter:

When you’re done making new adjustment areas, click on the magnifying glass in the top left corner to go back to the basic editing tools. I made my final tweaks like adding clarity and vibrance before saving my image.

After finishing your edits, click Save Image on the bottom left of the screen to save your work. Here’s how my edited image came out:

I still end up opening my images in Photoshop after using Camera RAW, but it’s mostly to fine tune details and add caption and copyright information.
I hope this tip helps! Please let me know if you found this post helpful or if you have anything to add!